
Template Fonts is reader supported. When you buy through links on our site, we may earn an affiliate commission. Learn more
Creating a fishbone diagram is an excellent way to organize ideas and identify the root cause of a problem. It is a visual tool that helps individuals or teams to brainstorm and analyze a complex issue. Canva is a user-friendly online graphic design platform that allows users to create different types of diagrams, including fishbone diagrams.
To create a fishbone diagram in Canva, users can choose from a variety of customizable templates and add different shapes, lines, and colors to represent the different causes and effects of the problem. Users can also add text and icons to make the diagram more informative and engaging. Canva’s drag-and-drop interface makes it easy to move and resize the elements of the diagram until the user is satisfied with the final result.
Overall, creating a fishbone diagram in Canva is an effective way to visually represent a complex problem and identify its underlying causes. With its user-friendly interface and customizable templates, Canva makes it easy for anyone to create a professional-looking fishbone diagram in no time.
Understanding Fishbone Diagrams
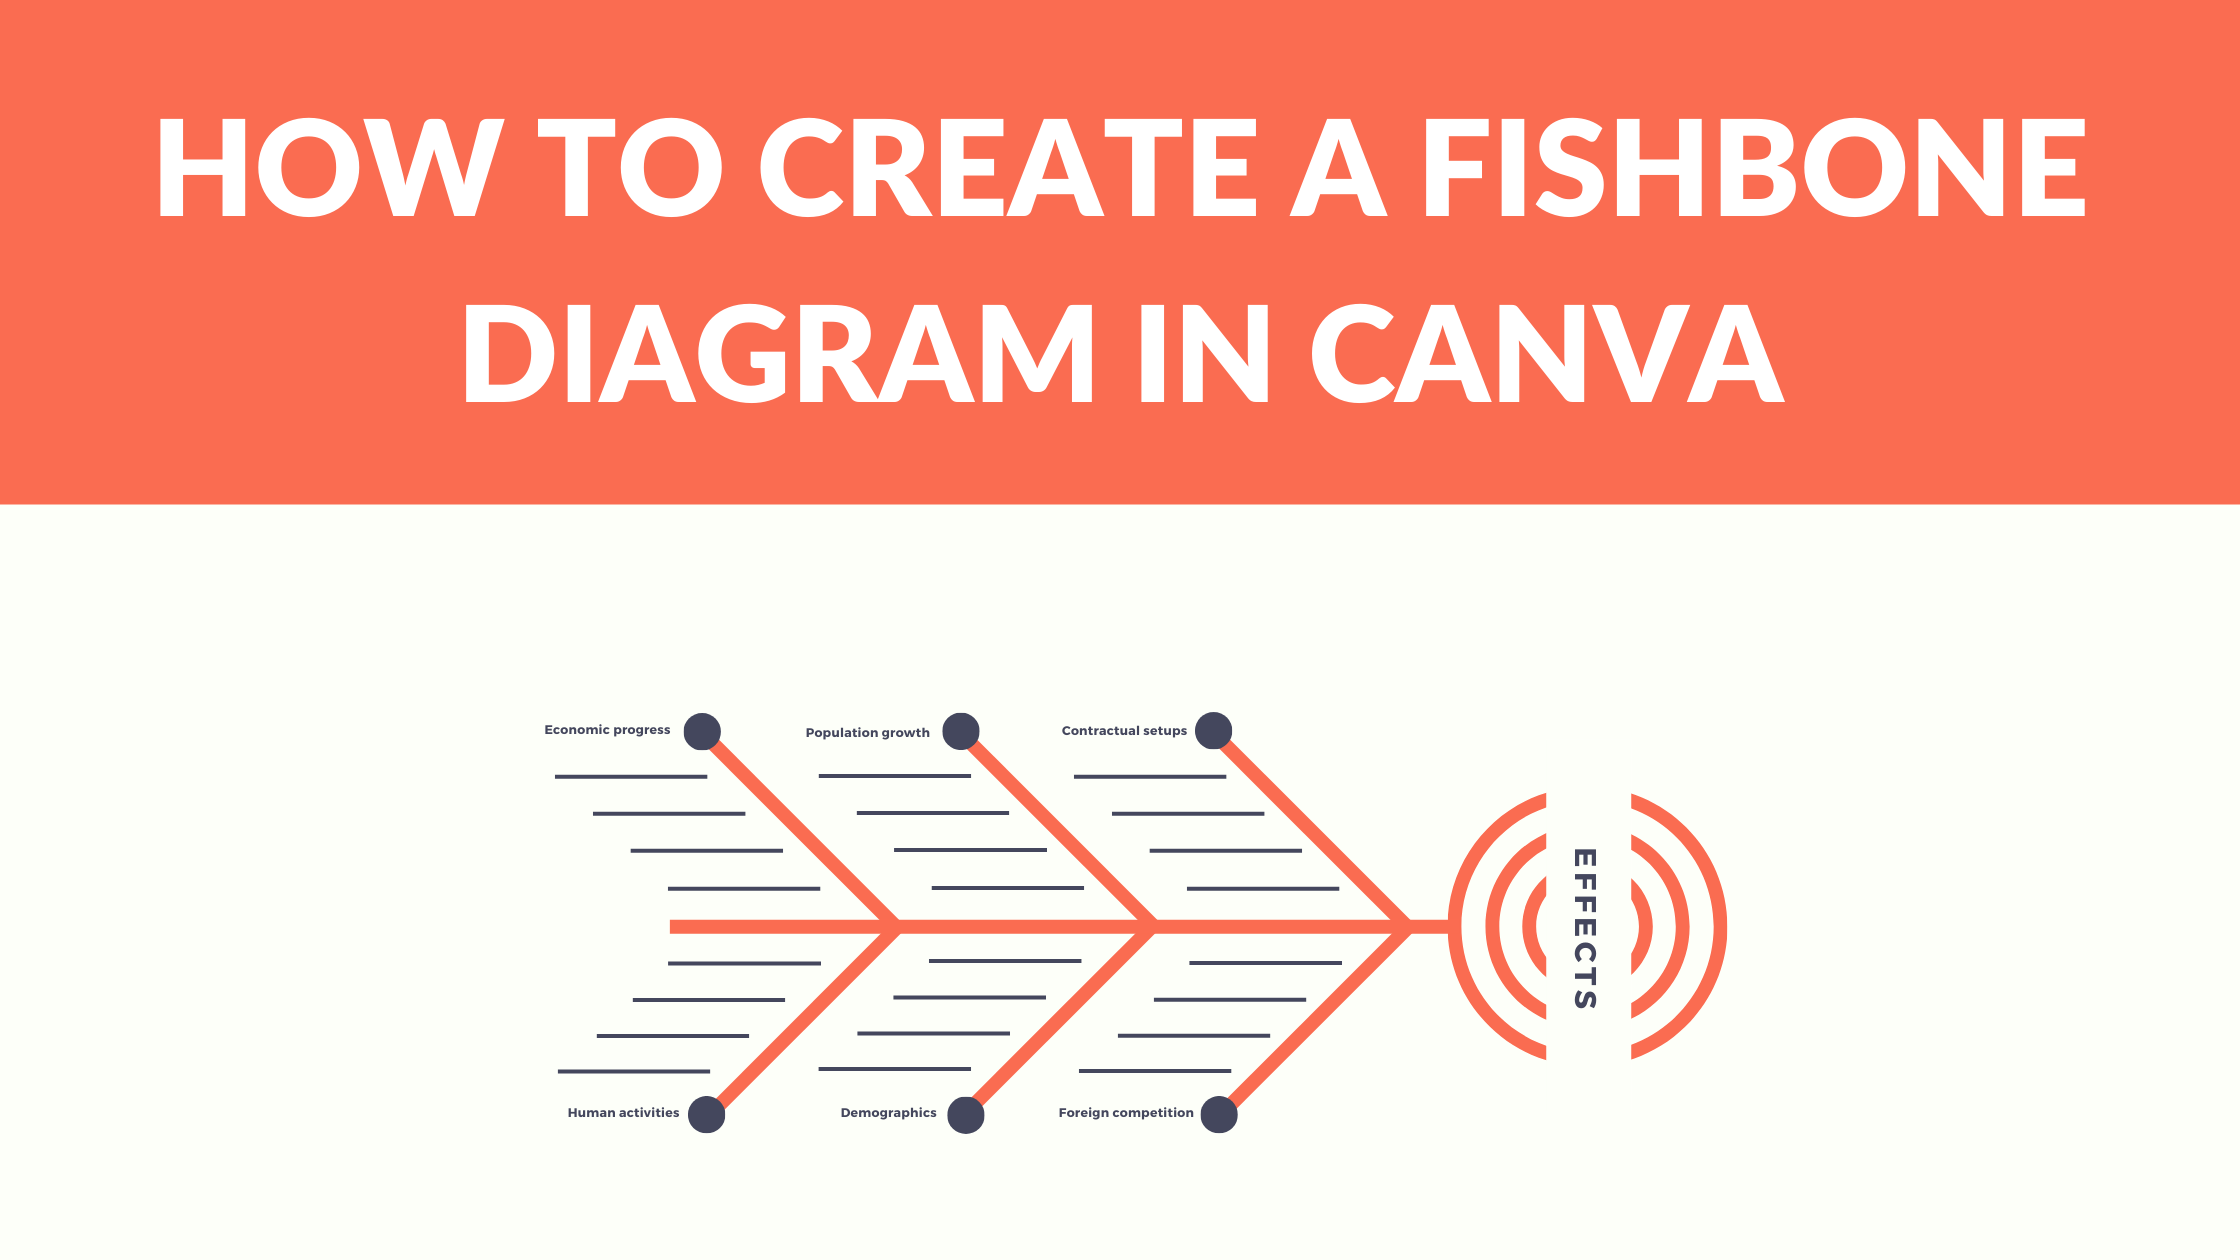
Fishbone diagrams, also known as Ishikawa diagrams, are a visual tool used to identify the root causes of a problem. They are typically used in problem-solving and quality control processes to help teams understand the underlying causes of an issue and develop solutions to address them.
Fishbone diagrams are called that because they look like the skeleton of a fish, with the head representing the problem or issue and the bones representing the potential causes. The diagram is structured with the problem at the head of the fish and the potential causes branching out from the spine.
The main benefit of a fishbone diagram is that it helps teams to identify all the possible causes of a problem and then narrow down the list to the most likely root causes. This makes it easier to develop effective solutions that address the underlying issues, rather than just the symptoms of the problem.
To create a fishbone diagram, it is important to first define the problem clearly and then brainstorm all the possible causes. It is also important to involve a diverse group of stakeholders in the process to ensure that all perspectives are represented.
Overall, fishbone diagrams are a powerful tool that can help teams to solve complex problems and improve quality control processes. With the help of Canva’s customizable templates, creating a professional-looking fishbone diagram is easier than ever before.
Why Use Canva for Fishbone Diagrams
Canva is a versatile and user-friendly graphic design tool that offers a wide range of templates and tools for creating professional-looking diagrams, including fishbone diagrams. The platform offers a simple and intuitive interface that allows users to create diagrams in a matter of minutes.
One of the main advantages of using Canva for fishbone diagrams is the ease of use. Unlike other diagramming tools that require extensive training and technical knowledge, Canva is designed to be used by anyone, regardless of their skill level. The platform offers a wide range of templates and pre-designed elements that can be easily customized to suit individual needs.
Another advantage of using Canva for fishbone diagrams is the ability to collaborate with others. The platform allows users to share their designs with team members and other stakeholders, making it easy to get feedback and make changes in real-time.
Finally, Canva offers a range of customization options that allow users to create unique and visually appealing fishbone diagrams. Users can choose from a wide range of fonts, colors, and other design elements to create a diagram that is both informative and visually appealing.
Related Posts:
- Are Canva Images Copyright Free?
- Why Is Canva Being So Slow? Tips to Improve Performance
- Best Canva Apps
Setting Up Your Canva Account
To create a fishbone diagram in Canva, you’ll need to set up an account. Here’s how to get started.
Signing Up
To sign up for a Canva account, simply go to canva.com and click on the “Sign up” button in the top right corner of the page. From there, you can sign up using your email address, Google, Facebook, or other methods.
Once you’ve signed up, you’ll need to verify your email address by clicking on the link in the verification email that Canva sends you. After that, you’re ready to start using Canva.
Navigating the Dashboard
Once you’ve signed up for a Canva account, you’ll be taken to the Canva dashboard. From there, you can create a new design, browse templates, or access your existing designs.
The Canva dashboard is divided into several sections, including:
-
Templates: This section contains a wide variety of templates that you can use to create designs quickly and easily.
-
Your designs: This section contains all of the designs that you’ve created in Canva.
-
Folders: This section allows you to organize your designs into folders.
-
Team: If you’re part of a Canva team, this section allows you to access your team’s designs.
-
Elements: This section contains a wide variety of design elements that you can use to create your own designs.
By familiarizing yourself with the Canva dashboard, you’ll be able to create a fishbone diagram quickly and easily.
Related Posts:
- How to Join a Class on Canva
- Why Can’t I Login to Canva? Causes of Canva Login Errors
- How to Cancel Your Canva Subscription
- How to Contact Canva Customer Support
- Canva Links Not Working
Creating a Fishbone Diagram in Canva
Creating a fishbone diagram in Canva is a straightforward process that can be completed in a few simple steps. With Canva’s easy-to-use templates, you can create a professional-looking fishbone diagram that will help you identify the root cause of a problem.
Choosing a Template
To create a fishbone diagram in Canva, start by choosing a template. Canva offers a variety of templates to choose from, including blank templates that you can customize to fit your needs. To find a fishbone diagram template, type “fishbone diagram” into the search bar, and select the template that best suits your needs.
Customizing the Template
Once you have selected a template, it’s time to customize it. Canva’s templates are fully customizable, so you can change the colors, fonts, and layout to fit your needs. To customize the template, simply click on the element you want to change, and use the editing tools to make your changes.
Adding Text and Graphics
After you have customized the template to your liking, it’s time to add your text and graphics. To add text, simply click on the text box and start typing. You can also add graphics by selecting the “Elements” tab and choosing the graphic you want to add.
By following these simple steps, you can create a professional-looking fishbone diagram in Canva that will help you identify the root cause of a problem.
Related Posts:
- How to Change a Logo Color in Canva
- How to Adjust Margins in Canva Designs
- Canva Vector Files: Can You Make Vectors in Canva?
- Canva Color Wheel
- Canva Rulers, Guides, & Gridlines
Saving and Exporting Your Fishbone Diagram
Once you’ve finished creating your fishbone diagram in Canva, it’s important to save your work and export the diagram for use in other applications. This section will cover the steps required to save and export your fishbone diagram.
Saving Your Work
To save your work in Canva, simply click on the “Save” button located in the upper right-hand corner of the screen. Canva automatically saves your work as you go, but it’s always a good idea to save your work manually to ensure that you don’t lose any progress. If you’re experiencing issues with saving, you can check out this article for troubleshooting tips.
Exporting the Diagram
To export your fishbone diagram, click on the “Download” button located in the upper right-hand corner of the screen. This will bring up a menu of different file formats to choose from, including PNG, JPG, and PDF. Select the file format that best suits your needs, and then click on the “Download” button to save the file to your computer.
It’s important to note that some file formats may be better suited for certain applications than others. For example, if you plan to print your fishbone diagram, you may want to export it as a PDF to ensure that the quality is preserved. On the other hand, if you plan to use your fishbone diagram in a presentation, you may want to export it as a PNG or JPG to ensure that it can be easily inserted into your slides.
Related Posts:
- How to Fix “Save Paused Error” in Canva
- Converting Canva Docs to Word Documents
- How Much Does it Cost to Print From Canva?
- Best Canva Video Downloader
- What to Do If Your Canva Images Won’t Download
Sharing Your Fishbone Diagram
Once you have created your fishbone diagram in Canva, you can easily share it with your team members or clients. Canva allows you to download the diagram in various formats such as PNG, JPG, or PDF, making it easy to add to your presentations, reports, or other projects.
You can also share the fishbone diagram with your team members via social media or email with just one click. This is particularly useful if you have team members who are not in the same location as you.
If you want to showcase your fishbone diagram on LinkedIn, you can follow the guide on How to Post a Canva Design to LinkedIn by Template Fonts. This guide will help you elevate your LinkedIn presence and showcase your Canva designs to boost your professional online profile.
If you want to import your fishbone diagram into Google Slides, you can check out How to Import Canva Into Google Slides by Template Fonts. This guide will help you seamlessly blend design and presentation, ensuring captivating presentations with a professional touch.
For presenters who want to engage their audience in real-time, Canva Live is a great feature to use. You can learn more about Canva Live and how it can revolutionize your presentations in the guide Canva Live: What is it and How Can Presenters Use it? by Template Fonts.
Related Posts: