

Template Fonts is reader supported. When you buy through links on our site, we may earn an affiliate commission. Learn more
Canva is a popular graphic design tool that allows users to create stunning designs with ease. One of the key features of Canva is the ability to arrange elements on a page. Whether you are designing a flyer, poster, or social media graphic, arranging elements is an essential step in creating a visually appealing design.
Arranging elements in Canva involves grouping, layering, and aligning elements. Users can group elements together to move them as a single unit, layer elements to control their order, and align elements to ensure they are properly positioned. These tools are essential for creating a well-organized design that effectively communicates your message.
Whether you are a beginner or an experienced designer, learning how to arrange elements in Canva is an important skill to have. In this article, we will provide a step-by-step guide on how to group, layer, and align elements in Canva. By following these tips and tricks, you can create stunning designs that are sure to impress your audience.
Understanding Canva’s Design Elements
Basic Design Elements
Canva has a variety of basic design elements that can be used to create a design. These include shapes, lines, icons, illustrations, and photos. The basic design elements can be found on the left-hand side of the Canva editor under the “Elements” tab.
Shapes can be used to add structure to a design, while lines can be used to create division or emphasis. Icons and illustrations can be used to add visual interest and convey a message, while photos can be used to add realism and context to a design.
Advanced Design Elements
Canva also offers advanced design elements such as charts, graphs, and diagrams. These elements can be found under the “Charts” and “Illustrations” tabs. Charts and graphs can be used to visualize data and statistics, while diagrams can be used to explain complex concepts.
Another advanced design element is the ability to upload custom fonts and use them in a design. This allows for greater customization and branding opportunities.
Arranging Elements in Canva
Canva is a graphic design tool that allows users to create high-quality designs for various purposes. One of the essential features of Canva is its ability to arrange elements in a design. This section will discuss the different ways to arrange elements in Canva.
Grouping Elements
Grouping elements is a useful feature in Canva that allows users to select multiple elements and move them as one. To group elements, select the elements you want to group by holding the Shift key and clicking each element.
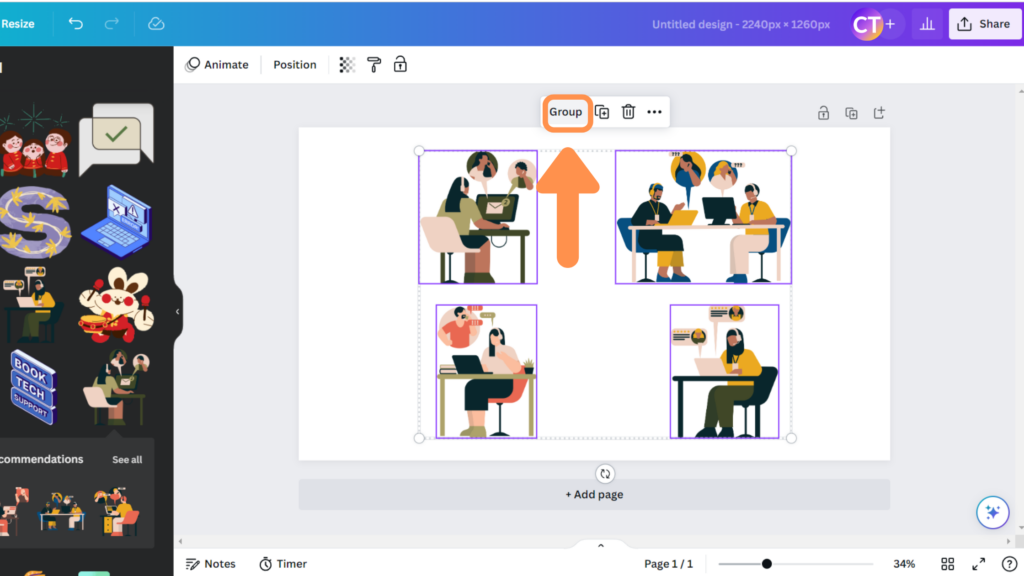
Then, right-click on the selected elements and choose the “Group” option. To ungroup elements, right-click on the group and select “Ungroup.”
Aligning Elements
Aligning elements is another essential feature in Canva that helps users arrange elements in a design. To align elements, select the elements you want to align by holding the Shift key and clicking each element. Then, click on the “Align” button on the top toolbar and choose the alignment option you want.
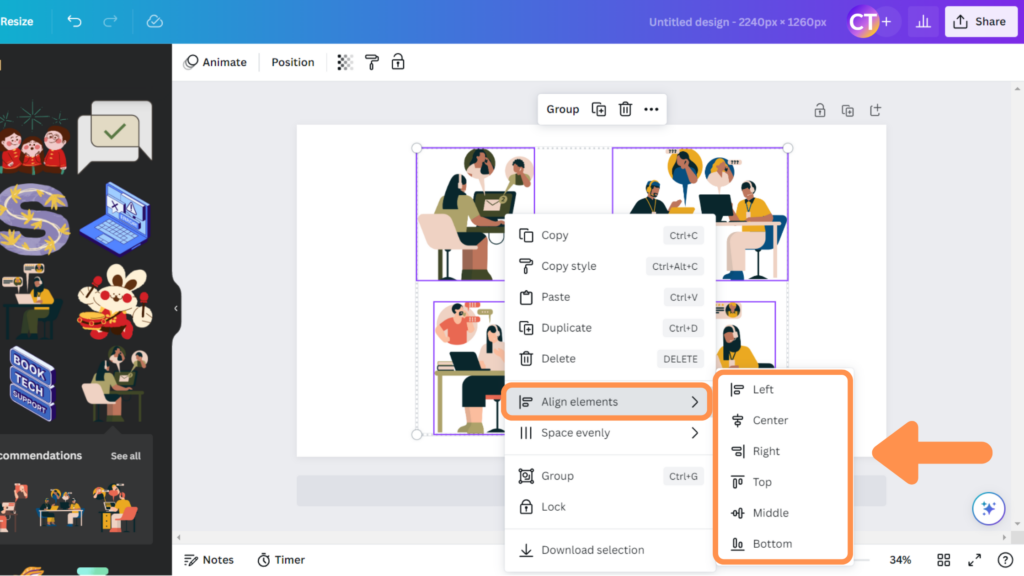
Canva provides different alignment options such as left align, right align, center align, top align, bottom align, and distribute vertically or horizontally.
Spacing Elements
Spacing elements is a feature in Canva that allows users to evenly distribute elements horizontally or vertically. To space elements, select the elements you want to distribute by holding the Shift key and clicking each element.
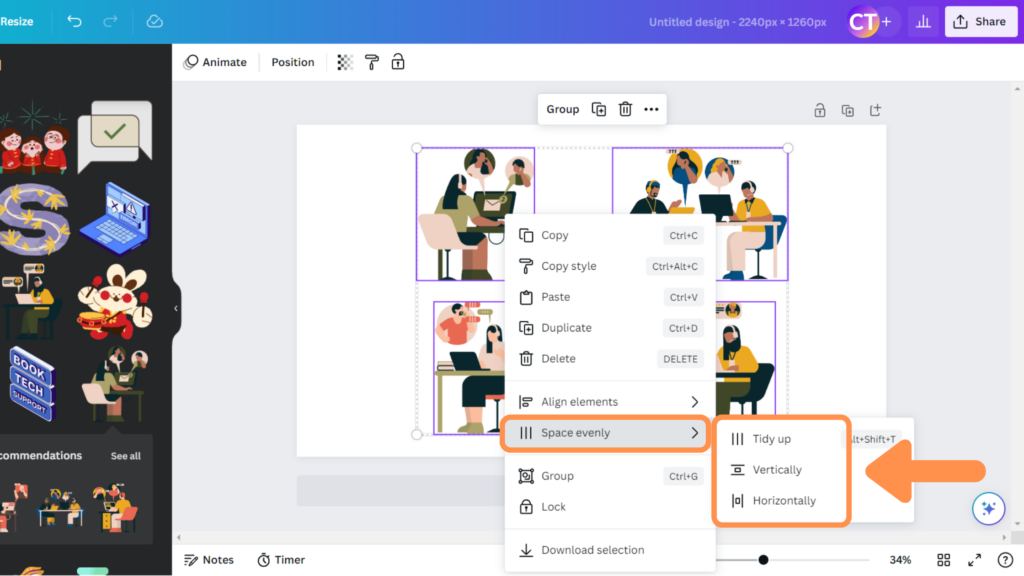
Canva provides different distribution options such as distribute horizontally or vertically, and distribute spacing evenly.
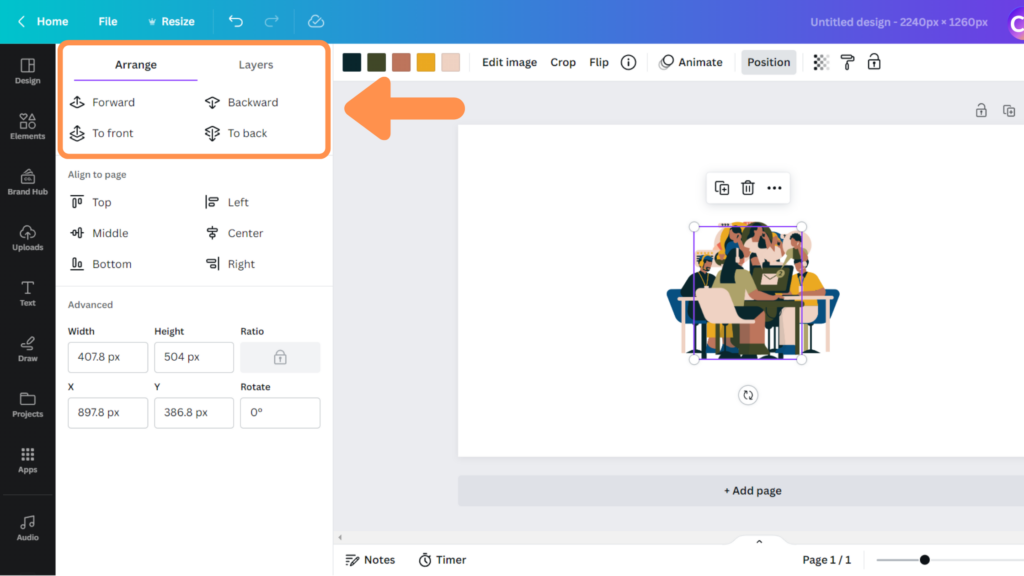
Layering Elements
Layering elements is a feature in Canva that allows users to arrange elements in a design by placing them in front or behind other elements. To layer elements, select the element you want to move and right-click on it. Then, choose the “Arrange” option and select the “Bring Forward,” “Bring to Front,” “Send Backward,” or “Send to Back” option.
Tips and Tricks
Arranging elements in Canva can be a daunting task, but with these tips and tricks, you’ll be able to create stunning designs in no time.
Using Grids and Guides
Canva offers grids and guides to help align elements in your design. To access them, click on the “View” tab and select “Grids and guides.” Grids are useful for creating symmetrical designs, while guides help align elements to specific points on the canvas. You can also customize the grid and guide settings to fit your design needs.
Keyboard Shortcuts
Keyboard shortcuts can save time and increase efficiency when arranging elements in Canva. Here are a few useful shortcuts:
| Shortcut | Action |
|---|---|
| Ctrl + G | Group selected elements |
| Ctrl + Shift + G | Ungroup selected elements |
| Ctrl + D | Duplicate selected elements |
| Ctrl + Z | Undo previous action |
Saving Time with Templates
Templates are a great way to save time when arranging elements in Canva. Canva offers a wide variety of templates for different design types, such as social media posts, presentations, and posters. Simply select a template and customize it to fit your needs. You can also create your own templates by saving a design as a template for future use.
Conclusion
Arranging elements in Canva can be a daunting task for beginners, but with practice and patience, it becomes easier. By using the alignment tools and grouping elements, users can create professional-looking designs quickly and efficiently. Remember to use the gridlines and snap-to-grid options to ensure that elements are perfectly aligned.
I hope you found this guide covering how to arrange elements in Canva, useful! Be sure to check out our blog for more article covering the essential tips, tricks, and advice for Canva! Also, if you haven’t already tried CanvaPro, you can try it for free for 30 days!